
How To Build Your Own Humidor for Around $25 in 3 Easy Steps
I’ve been smoking cigars for over 15 years and most likely went through 4 or 5 humidors over that time. Some were gifts that cost around $50 (regardless of the price, it was truly a nice gift as it’s the thought that counts) and the most expensive were over $400 which was insane considering what you are about to read. That is why I decided to do DIY Cigar Humidor on the cheap.
A box of cigars is typically sold in bundles of 20 to 25 in my experience. Plus you will hold onto special occasion cigars, so you’ll need to have something that will keep about 30 or so cigars.
How do you build a humidor saving you a lot of money and also have a great conversational piece during football season in the man cave?
When building your humidor, please bear in mind that it has to be lined with Spanish cedar due to the wood’s aromatic properties and also allows to humidor to maintain an appropriate humidity for your cigars. We suggest you visit a specialty wood store as this may the only hard to get material you will need for your project.
Here is a breakdown of what you will need:
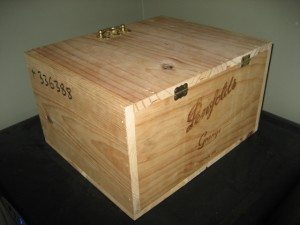
– An empty wooden wine box (suggested) as most wine store will most likely just give them to you
-Enough Spanish Cedar to line the box
-Hinges to finish the box
-A hand saw
-Sandpaper
-Wood glue
-Hammer
– Nails
Step 1: Cut the Cedar
Cut the cedar by hand with a table saw so that each piece would match the lid and also sink into the box as it should rest on all four side of the liner, We recommend over cutting them a bit, then sanding them to a perfect fit.
Note: Sanding by hand requires a lot of patience.
Step 2: Glue to the Wine Box and Nail It Together
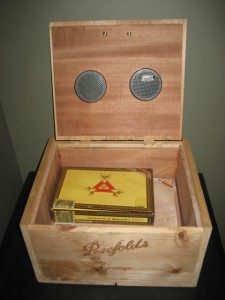
When each piece is the right size, I then glued the bottom cedar piece to the bottom of the wine box, then the four sides. I then let the cedar that lined the lid rest openly on the four side pieces before I glued it. I applied the glue and placed the lid on the cover in the right place to add the hinges. Then I hammered in a few small nails.
Step 3: Wait for Glue to Dry and Then Add Components
After waiting for the glue to dry, I pulled up on the handle, and the lid made a sucking noise and pulled free! This was great as I could already smell the cedar inside the box. I then bought an Abbey humidor puck for about $6 as well as a hygrometer from a pet store for $2. My total cost now was just around $25.
To test a hygrometer, take a small neutral container like a bottle cap, sprinkle some table salt in the cap. Then you should wet the salt so that it is partly dissolved. Put the cap and your hygrometer in a zip-lock bag for 24 hours. The hygrometer should now read 75%. After a few days left alone, I checked again and discovered a hygrometer that displayed 70% humidity.
Now it’s time to stock your humidor as we’re working a piece that will make the decision easier for you.


